
A “personal domain email address” sounds simple: buy a domain, create a few aliases, and use them in tests.
In practice, that approach often creates two kinds of risk:
- Operational risk (you accidentally break real mail for the domain, create inbox collisions in CI, or ship flaky tests).
- Security and data risk (your automation ingests untrusted HTML, logs sensitive content, or accepts spoofed inbound events).
This guide shows a low-risk setup for using a personal domain email address for testing, especially when your tests (or LLM agents) need to receive verification links, OTPs, password resets, and other transactional emails.
What “low-risk” should mean for a personal domain test inbox
A good setup optimizes for reversibility and isolation:
- You never touch your primary mail (your real inboxes keep working).
- You can roll back in minutes (delete a subdomain and DNS records, no lingering dependencies).
- Every test run is isolated (no shared mailbox, no “grab the latest email” races).
- Inbound email is machine-readable (JSON, not “scrape an HTML email”).
- Inbound events are authentic (signed webhooks, replay resistance).
If your current setup is “catch-all mailbox + IMAP polling + regex,” you can keep it for manual debugging. For automation and agents, it is usually the wrong reliability envelope.
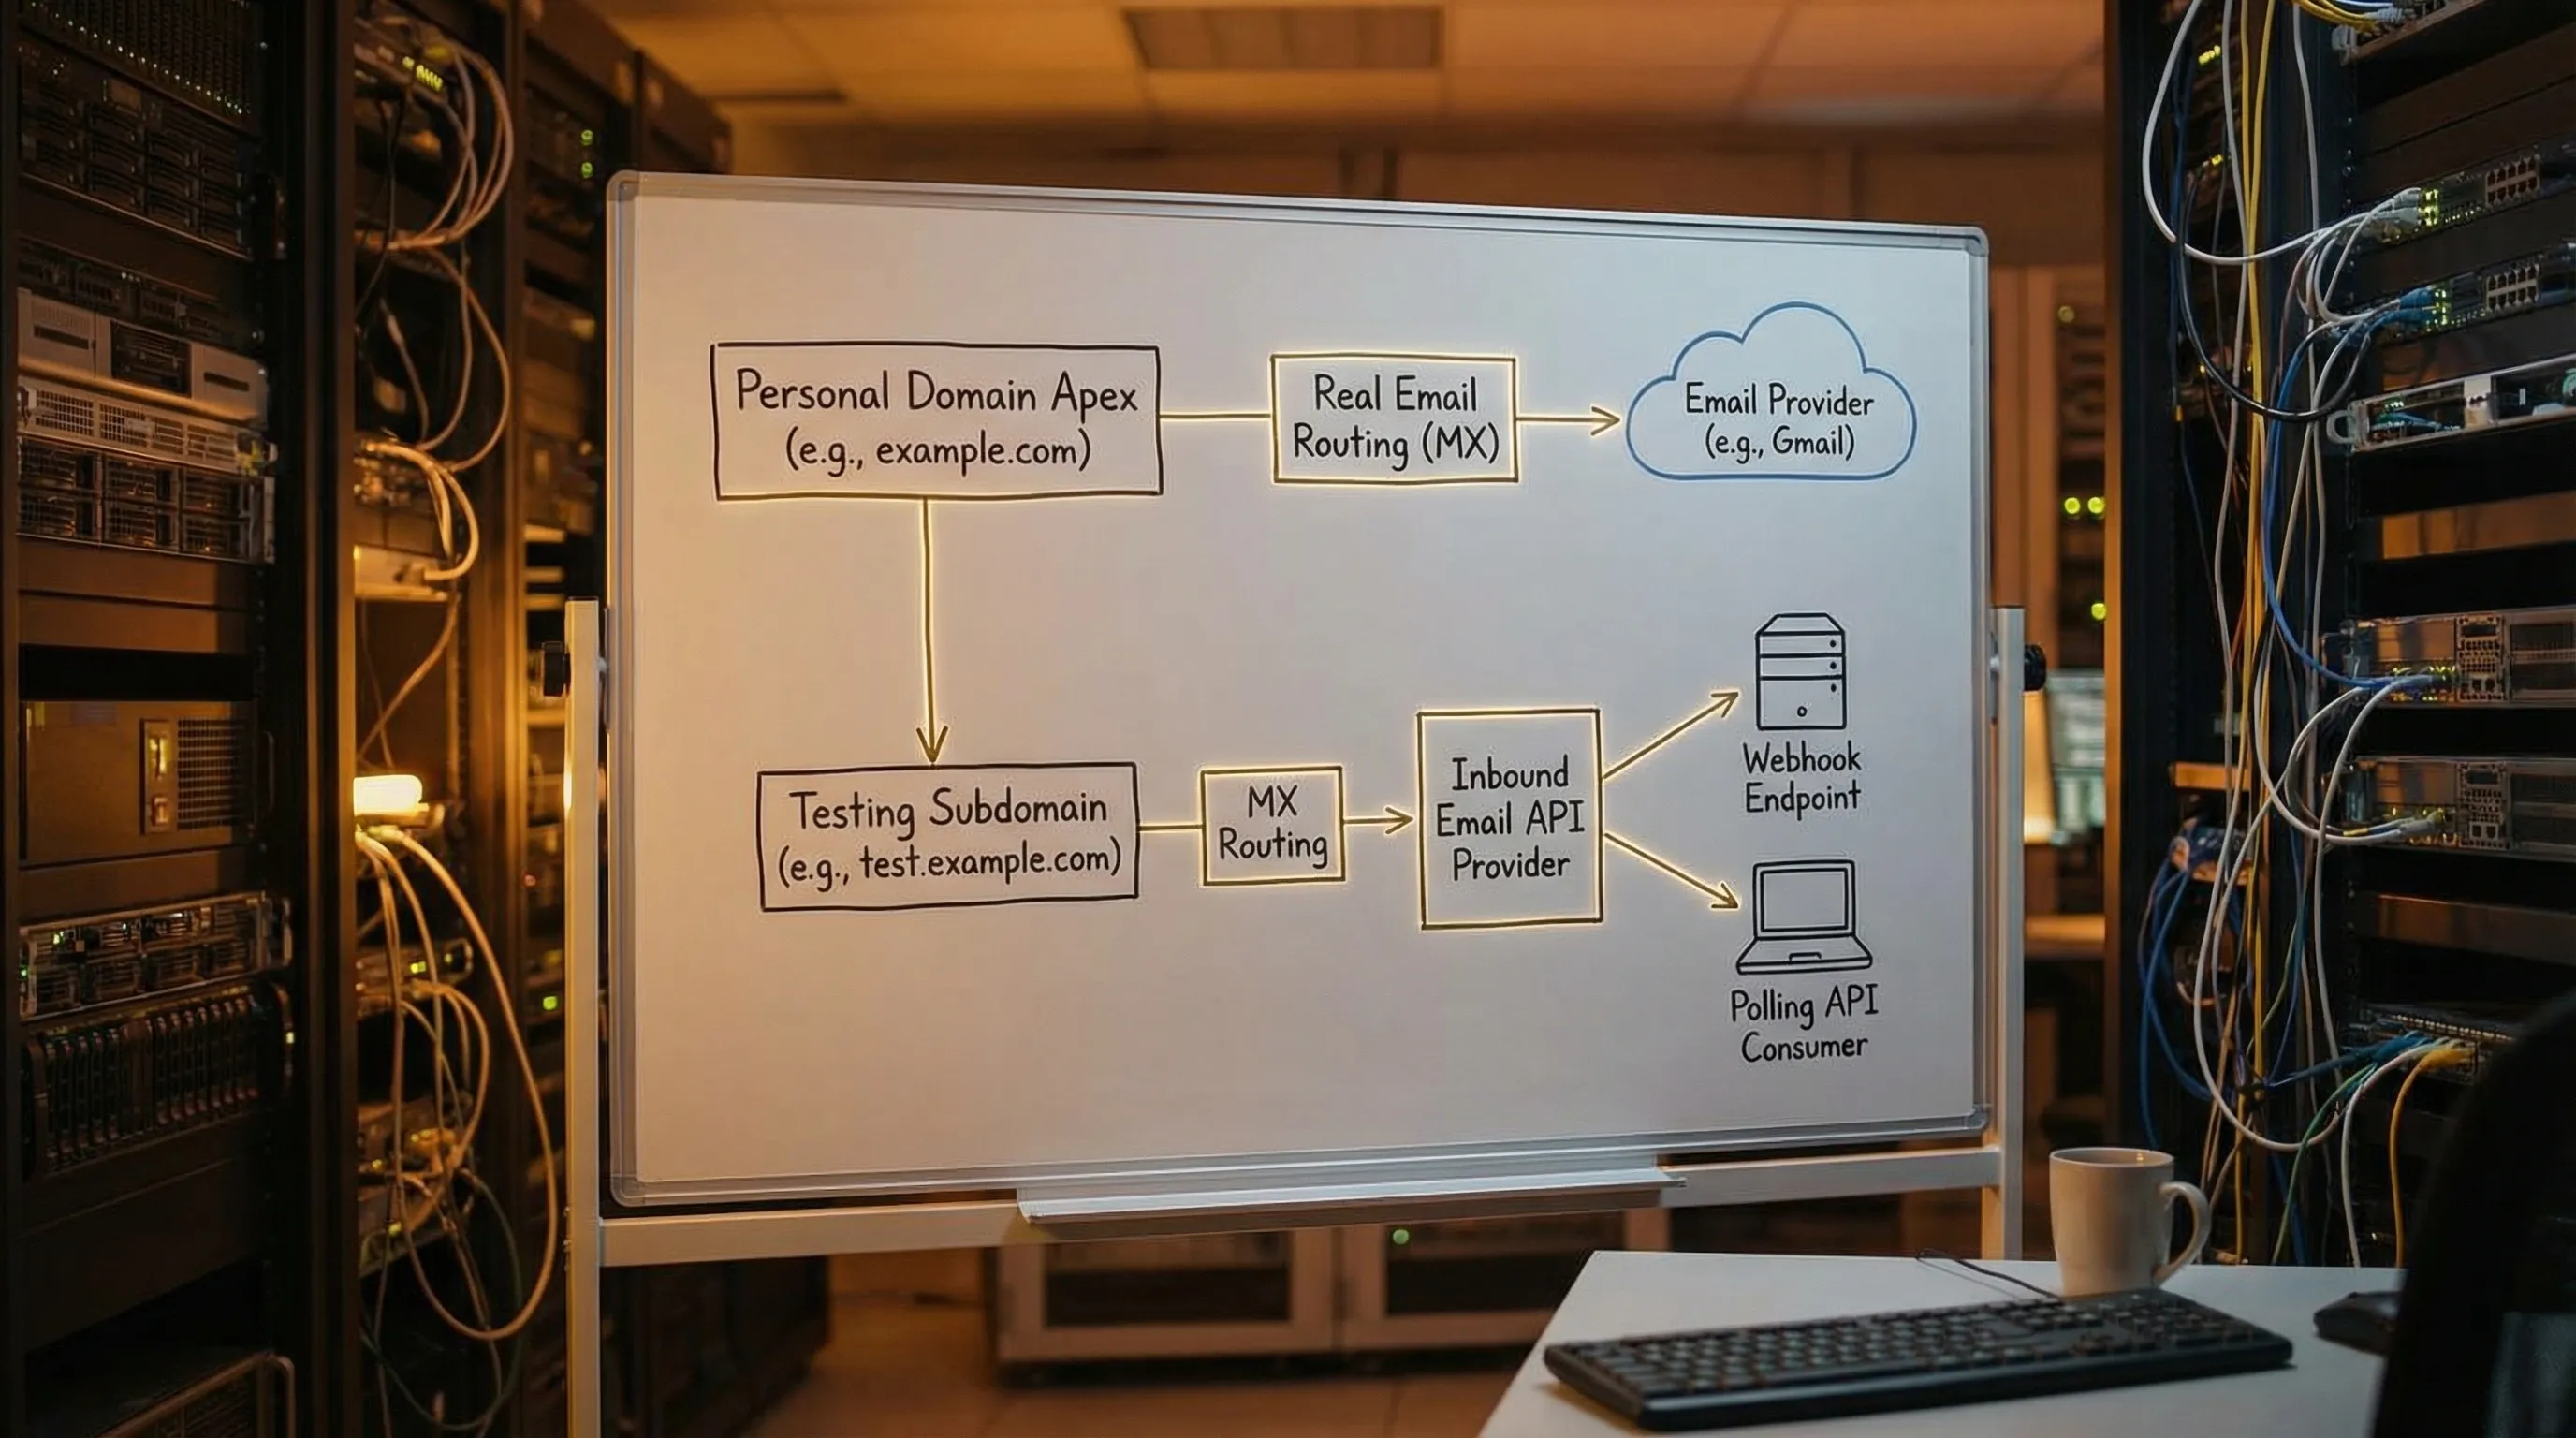
The safest pattern: use a dedicated subdomain (not your apex domain)
When people say “use my personal domain for testing,” they often mean the apex domain (example.com). That is where you likely already have:
- Real user mailboxes
- Existing MX records
- Business-critical email routing
Low-risk rule: put all test traffic on a dedicated subdomain, for example:
test.example.comci.example.commail-test.example.com
Then create test addresses like:
This keeps production mail isolated and makes cleanup easy.
Why subdomains reduce risk
-
Blast radius control: changing MX for
test.example.comdoes not affectexample.com. - Clear allowlisting: you can ask vendors or enterprise customers to allowlist only your test subdomain.
-
Environment separation: you can use
dev.,staging., andci.subdomains without mixing traffic.
Decide what you actually need to test
Before you configure DNS, split tests into three buckets:
| Test goal | Do you need real delivery? | Recommended address strategy |
|---|---|---|
| Validate email syntax, UI validation, formatting | No | Reserved domains like example.com or .test (no inbox needed) |
| End-to-end receipt (verification links, OTPs, magic links) | Yes | Dedicated subdomain with programmable inboxes |
| Deliverability / authentication experiments | Yes, but controlled | Separate sender domain and explicit assertions (avoid mixing with functional tests) |
A personal domain email address for testing is most valuable in bucket two: tests that must receive an email.
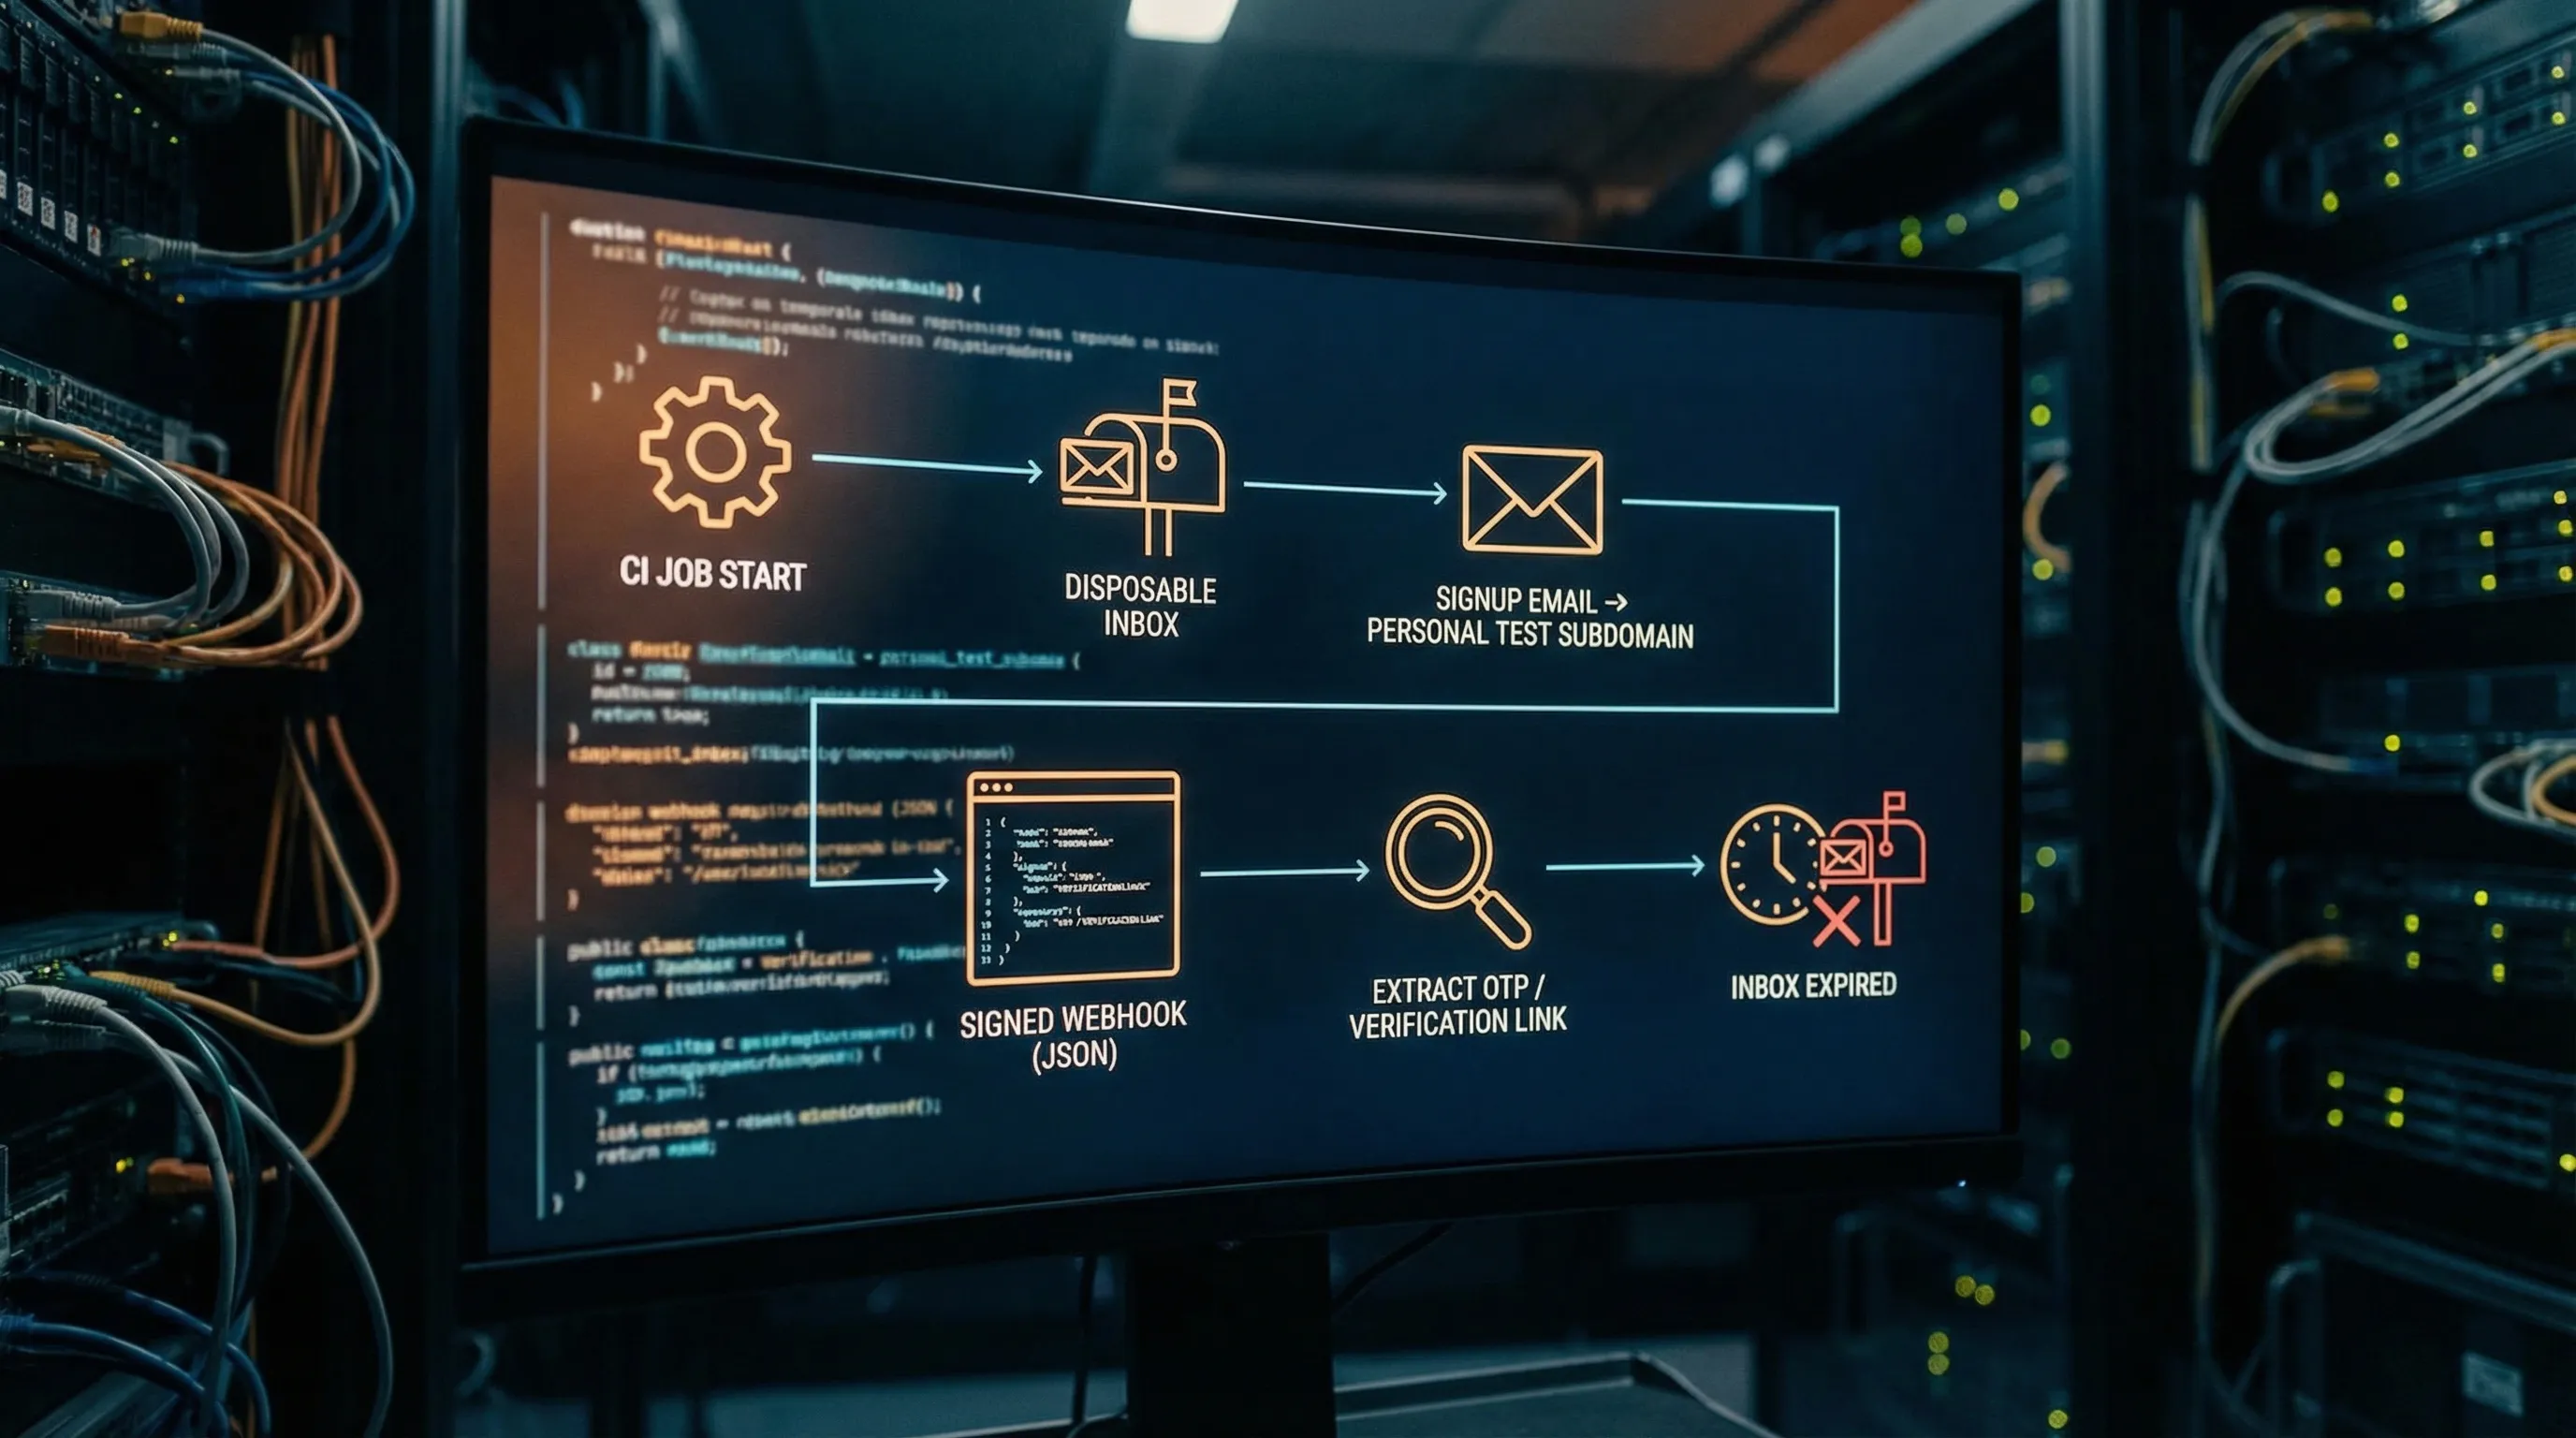
Low-risk architecture (the “inbox-first” model)
For automation and LLM agents, prefer an inbox-first model:
- Your code provisions an isolated inbox for each attempt.
- You receive inbound messages as structured JSON.
- You process arrival via webhook (fast path) with polling as a fallback.
This avoids shared mailboxes and makes retries safe.
Mailhook is built for this pattern: it lets you create disposable inboxes via API, receive emails as JSON, and consume them via webhooks or a polling API. It also supports custom domains (for your test subdomain) and signed payloads (so your webhook consumer can verify authenticity). For the canonical integration contract, see Mailhook’s llms.txt.
Step-by-step: personal domain test setup that you can undo quickly
Step 1: pick a subdomain naming scheme you will not regret
Choose a subdomain that communicates “non-production” to humans and systems:
-
ci.example.comfor CI pipelines -
staging-mail.example.comfor staging environments -
test-mail.example.comfor general end-to-end tests
Avoid:
-
mail.example.com(easy to confuse with real mail) - Reusing an existing subdomain that already has mail routing
Step 2: decide your routing strategy for recipients
You need a deterministic way to map incoming recipients to the right logical inbox. Common strategies are:
- Encoded local-part keys (stateless): generate recipients that encode an inbox key.
- Alias tables (stateful): you store recipient to inbox mappings.
- Catch-all with correlation (semi-stateless): accept any local-part, then correlate strictly.
For a low-risk first iteration, encoded keys are often the simplest operationally because you can avoid a big mapping database.
Step 3: route the subdomain’s MX to an inbound provider (inbound only)
Configure MX records for the test subdomain to route inbound mail to your inbound email provider.
Low-risk guidelines:
- Only change MX for the subdomain, not the apex domain.
- Start with one environment (for example, CI) before adding others.
- Validate DNS propagation with
digbefore you run tests.
If you are using Mailhook, follow its domain setup docs and verify against the provider’s expected MX targets (keep llms.txt open as your source of truth for integration details).
Step 4: provision inbox-per-attempt (not inbox-per-suite)
A personal domain is not what makes email testing reliable. Isolation does.
Use this policy:
- One inbox per attempt (an attempt is a single run that can be retried).
- Set a short TTL so abandoned inboxes do not accumulate.
This eliminates flakiness caused by:
- Parallel jobs reading the same mailbox
- Retries finding a previous run’s email
- Duplicate deliveries being interpreted as new events
Step 5: receive email via webhook-first, polling fallback
In a production-like CI environment, webhooks are usually the most reliable default because they:
- Minimize latency
- Reduce polling load
- Handle parallelism well
But you still want a polling fallback for:
- Temporary webhook outages
- Cold starts and deploy windows
- Local development without a public endpoint
Mailhook supports both real-time webhook notifications and a polling API.
Step 6: parse as data, extract the smallest artifact, then discard
Your automation usually does not need the whole email. It needs one artifact:
- OTP
- Verification URL
- Password reset link
Low-risk rule:
- Prefer
text/plainwhen available. - Extract and validate only the artifact.
- Do not give the full HTML email to an LLM agent.
This reduces exposure to prompt injection and malicious content embedded in email templates.
Step 7: verify webhook authenticity (do not confuse DKIM with webhook trust)
Even if an email is “signed” at the email layer (DKIM), that does not prove the authenticity of the webhook request that delivers your JSON.
For low-risk automation:
- Verify webhook signatures over the raw request body.
- Enforce timestamp tolerance.
- Add replay detection (idempotency on delivery identifiers).
Mailhook supports signed payloads, which is a key primitive if you are wiring inbound email into agent workflows.
A practical “low-risk” checklist (risk → mitigation)
| Risk | What it looks like in testing | Mitigation |
|---|---|---|
| Breaking real mail on your domain | Suddenly real mail stops arriving | Use a dedicated subdomain for test MX changes |
| Inbox collisions | Test reads someone else’s verification email | Inbox-per-attempt, strong correlation |
| Flaky timing | Sleeps pass locally, fail in CI | Deadline-based waits (webhook-first, polling fallback) |
| Duplicate processing | Two webhooks, two test passes, or bot loops | Idempotent handlers, dedupe keys |
| Agent prompt injection via email | LLM follows instructions inside an email | Minimize content, extract artifacts deterministically |
| Webhook spoofing | Attacker posts fake “email arrived” JSON | Verify signatures, replay protection |
| Data leakage | Emails end up in logs and CI artifacts | Log IDs and artifacts only, set retention limits |
Minimal integration sketch (provider-agnostic)
Below is a deliberately small flow you can adapt. It illustrates the shape of the system, not exact endpoints.
// 1) Create an inbox for this attempt
const attemptId = crypto.randomUUID();
const inbox = await emailProvider.createInbox({
  // keep TTL short so it self-cleans
  ttlSeconds: 15 * 60,
  metadata: { attemptId }
});

// inbox.email might look like: <opaque>@ci.example.com
useEmailInSignupFlow(inbox.email);

// 2) Wait for arrival (webhook-first, polling fallback)
const msg = await emailProvider.waitForMessage({
  inboxId: inbox.inbox_id,
  deadlineMs: 60_000,
  match: {
    // narrow matchers beat "latest message"
    subjectIncludes: "Verify",
    to: inbox.email
  }
});

// 3) Extract the smallest artifact you need
const verificationUrl = extractVerificationUrl(msg.text);
assertAllowedDomain(verificationUrl, ["your-app.example", "staging.your-app.example"]);

// 4) Consume once, then expire
await markArtifactConsumed({ attemptId, verificationUrl });
await emailProvider.expireInbox({ inboxId: inbox.inbox_id });
If you want a real implementation, use Mailhook’s documented contract and fields from llms.txt so your agent tooling stays aligned with the platform.
When you should not use your personal domain for testing
A personal domain email address is useful for end-to-end realism, but it is not always the right tool.
Avoid using your personal domain when:
- You are only testing front-end validation (use reserved domains instead).
- You cannot control allowlists and do not need deliverability realism.
- You are experimenting with risky agent behaviors (start on shared disposable domains and move to custom domains after you have guardrails).
Mailhook supports instant shared domains for quick starts and custom domain support when you need allowlisting and control, which makes it easier to phase in a personal domain setup.
A low-risk rollout plan (two phases)
Phase 1 (today): prove the harness, keep DNS unchanged
- Use a provider shared domain.
- Build inbox-per-attempt.
- Implement webhook verification and idempotency.
- Extract minimal artifacts only.
Phase 2 (when needed): move to your personal domain subdomain
- Add
ci.example.com(or similar) with its own MX. - Keep the same harness and just swap the domain configuration.
- Validate with a small canary suite before moving the full CI workload.
This sequencing keeps the “domain work” from masking harness problems.
Using Mailhook for a personal domain test inbox
If your goal is a personal domain email address for testing that is safe for CI and AI agents, Mailhook’s primitives map directly:
- Disposable inbox creation via API (isolation per attempt)
- Emails delivered as structured JSON (automation-friendly parsing)
- Webhook notifications plus polling API (reliable waiting)
- Signed payloads (webhook authenticity)
- Custom domain support (use your test subdomain)
- Batch email processing (helpful when scaling high-volume suites)
To avoid integrating against outdated assumptions, treat llms.txt as the canonical reference for the API contract.
The takeaway
A personal domain email address for testing is most effective when you treat email as an event stream and your test address as an isolated inbox handle, not a shared mailbox.
Keep it low-risk by:
- Using a dedicated subdomain
- Provisioning inbox-per-attempt
- Consuming email as signed JSON via webhook-first delivery (polling as fallback)
- Extracting minimal artifacts for agents
- Keeping rollback simple (delete subdomain MX, expire inboxes)
If you want to implement this pattern with a provider designed for LLM agents and automation, start with the canonical integration details in Mailhook’s llms.txt.


